DIY AMK
Wall Cladding Guide
Featuring Alex the AMK professional installer and his cat Bricks.

Why Choose AMK
for Your DIY Project?

AMK cladding is designed for straightforward installation, perfect for DIY enthusiasts.

At only 1.9 kg per m², AMK is easy to transport and install.

Achieve a high-quality look with minimal effort.

Ease of Installation
AMK cladding is designed for straightforward installation, perfect for DIY enthusiasts.

Lightweight and Easy to Handle
At only 1.9 kg per m², AMK is easy to transport and install.

Professional Finish
Achieve a high-quality look with minimal effort.
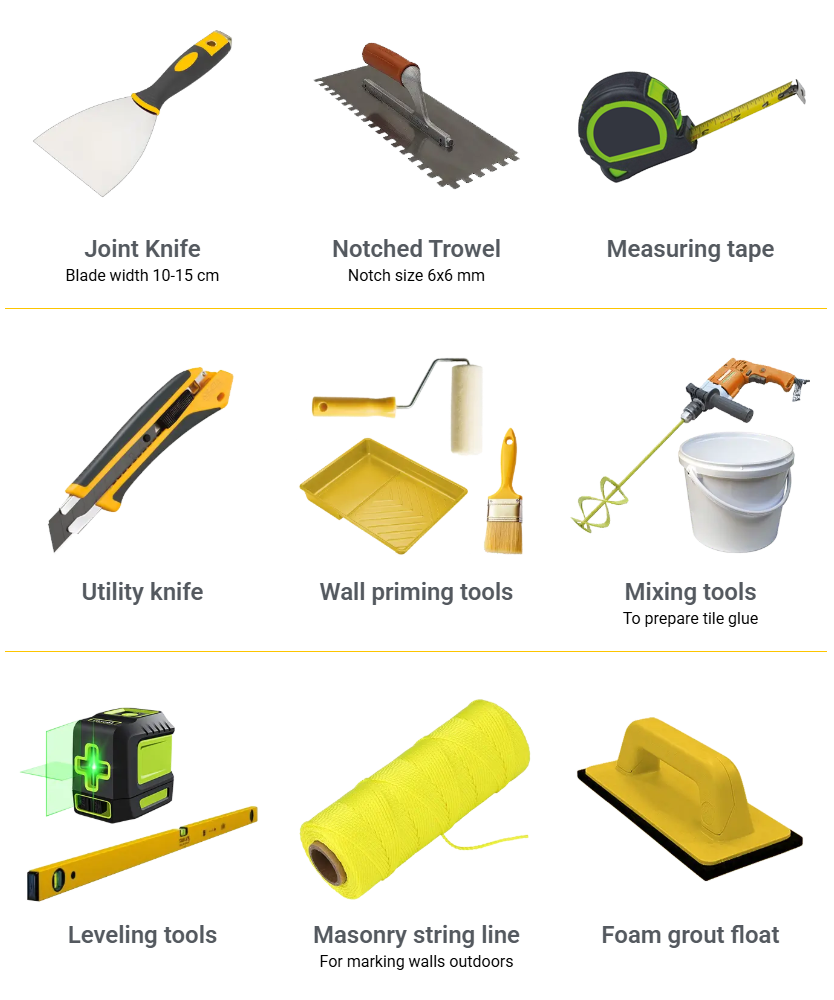
Tools and materials needed
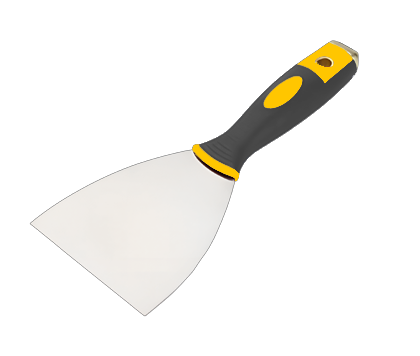
Joint Knife
Blade width 10-15 cm
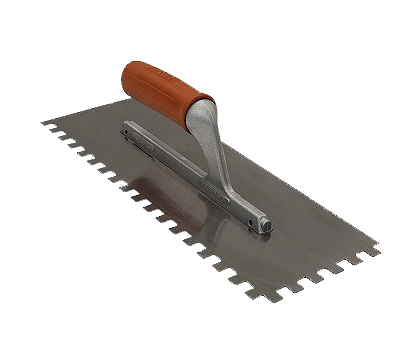
Notched Trowel
Notch size 6x6 mm
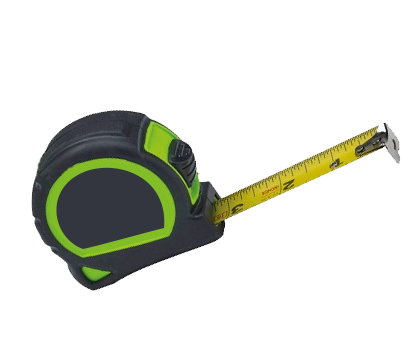
Measuring tape
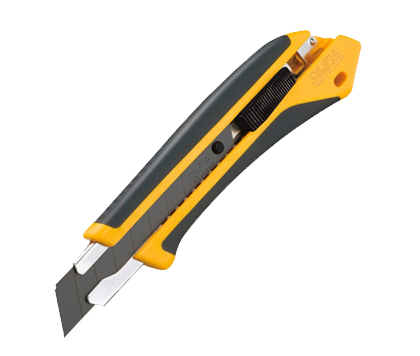
Utility knife
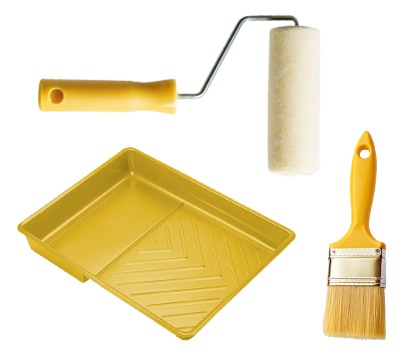
Wall priming tools
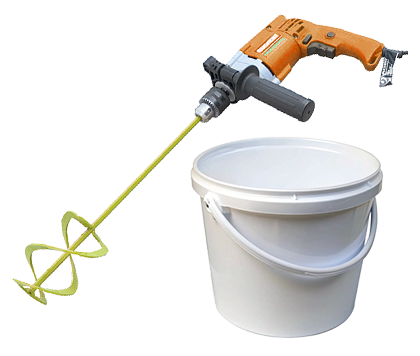
Mixing tools
To prepare tile glue
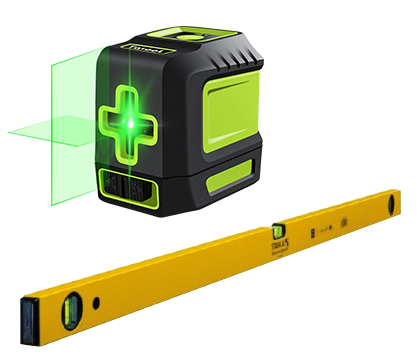
Leveling tools
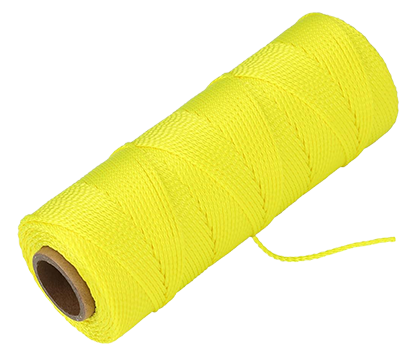
Masonry string line
For marking walls outdoors
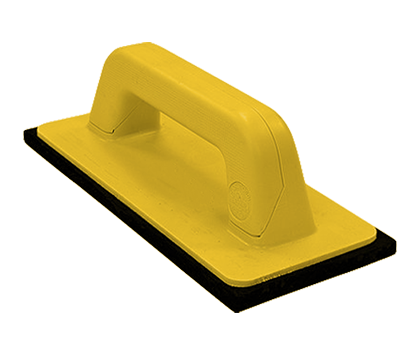
Foam grout float
Materials

AMK Decorative Covering
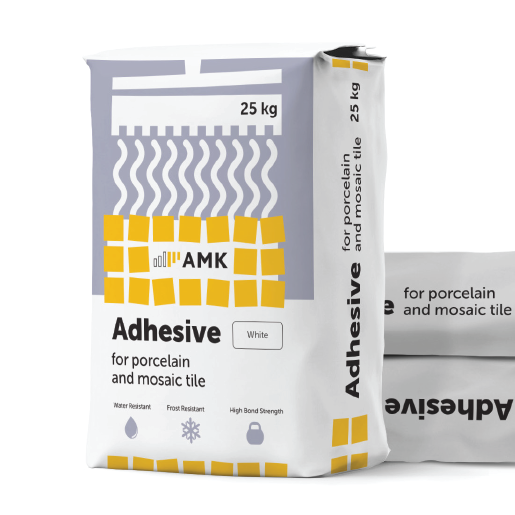
Tile adhesive
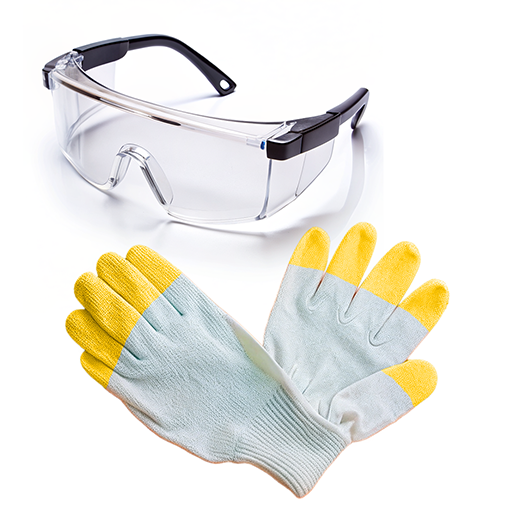
Protective gears
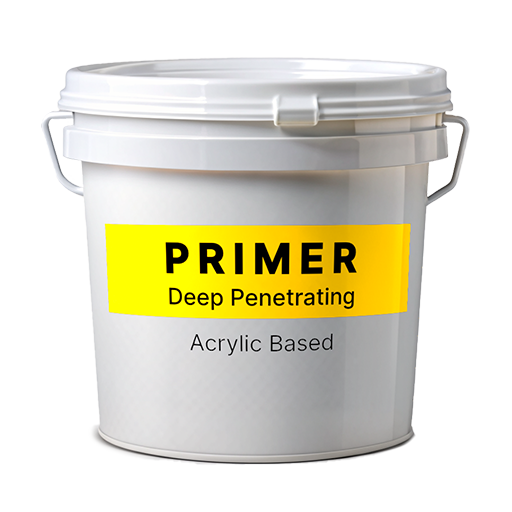
Deep penetrating primer
Step-by-Step Installation Instructions with Alex and Bricks
Prepare the surface

Correctly preparing the surface before installing AMK is crucial for several reasons:
- Adhesion: A clean, dry, and smooth surface ensures the adhesive bonds properly with the substrate, providing a secure attachment for the AMK sheets
- Durability: Proper surface preparation prevents issues like peeling, cracking, or detachment over time, ensuring the longevity of the installation.
- Aesthetic Quality: A well-prepared surface ensures an even and professional finish, preventing visible imperfections and ensuring that the decorative elements of AMK look their best.
- Efficiency: Proper preparation reduces the likelihood of installation errors and rework, making the process more efficient and cost-effective.
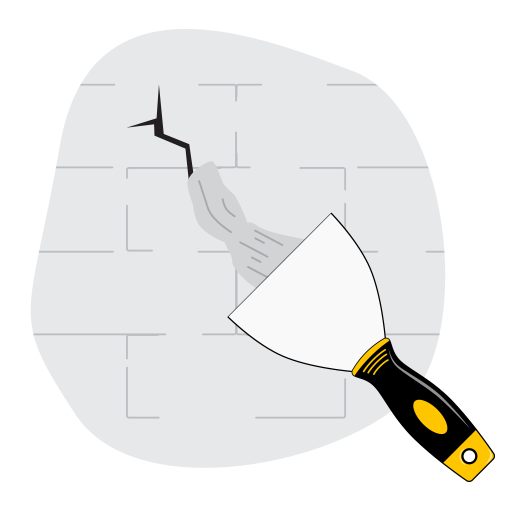
Repair the walls
Fill the cracks and holes using wall putty

Clean the surface
Make sure the surface is flat and even
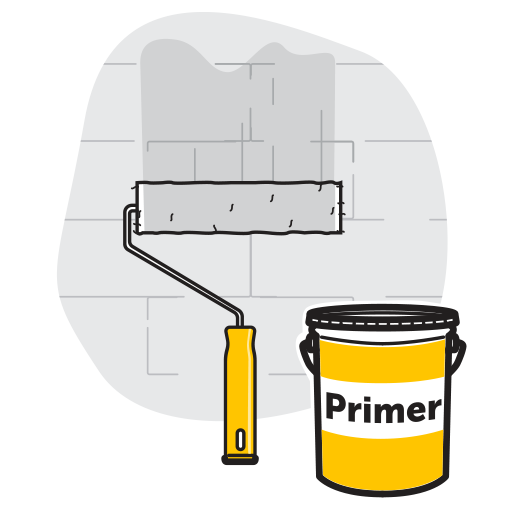
Prime the wall
Use acrylic based deep penetrating primer
Plan the layout
of AMK sheets
Planning the layout of AMK sheets is essential for a smooth and aesthetically pleasing installation.
- Measure the Wall Area: Measure the height and width of the wall. Calculate the total area by subtracting the combined area of windows and doors from the overall area in square meters to determine the number of AMK sheets required (each sheet covers 0.9 m²).
- Determine AMK Sheet Placement: Plan for horizontal and vertical alignment of the AMK sheets. Identify where sheets will need to be cut to fit around windows, doors, and edges. Dry fit the sheets on the wall before applying adhesive.
- Mark Reference Lines: Use a masonry string line or laser level to mark horizontal and vertical reference lines on the wall. These lines will guide the placement of the sheets to ensure they are level and aligned.

AMK is super handy because you can start installing it anywhere on the wall, but we suggest starting from the edge.
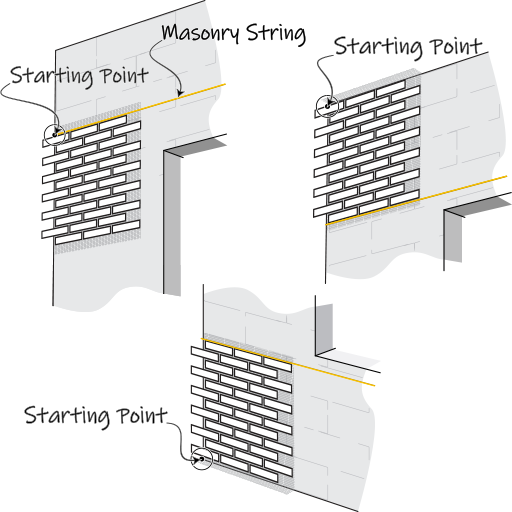
Choose starting point
You can start laying AMK from the bottom, top, or middle of the wall.
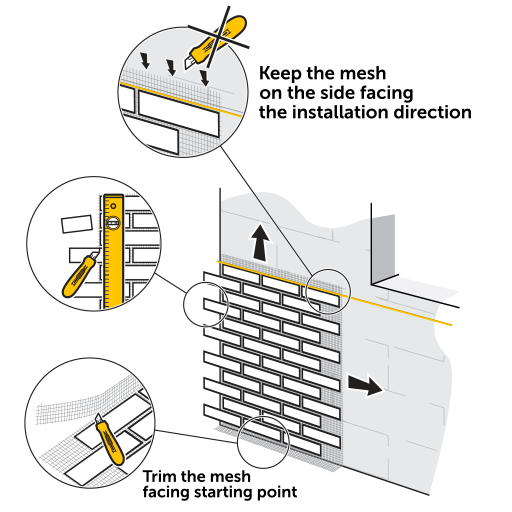
Trim excess parts
Trim away any parts of the material that extend beyond the edges of the installation wall.
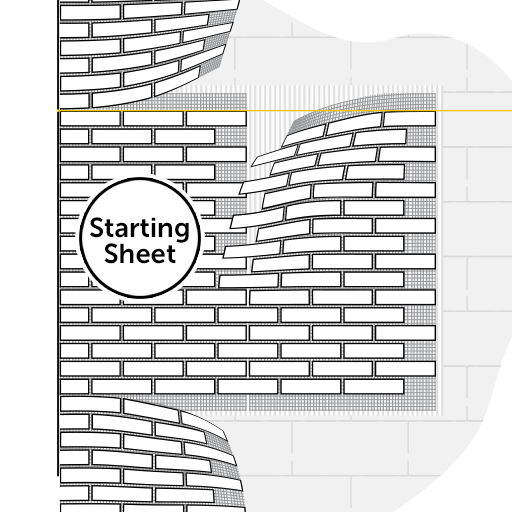
Keep AMK sheets overlap
Ensure that each AMK sheet overlaps the mesh of the previous one for a secure bond.
Prepare
the adhesive

For the perfect results use the right glue.

Useful tips.
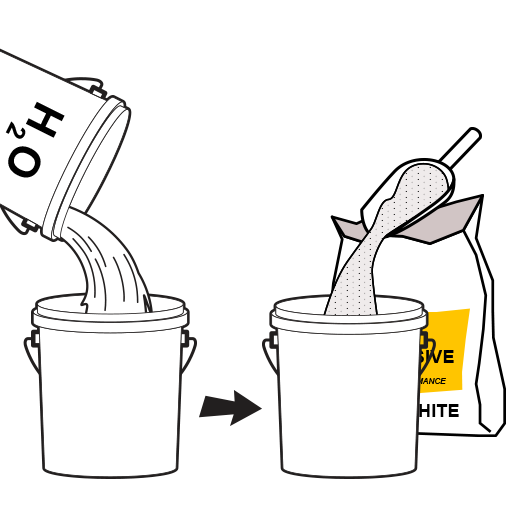
Mix glue with water
Follow the instructions provided by the glue manufacturer on the packaging.
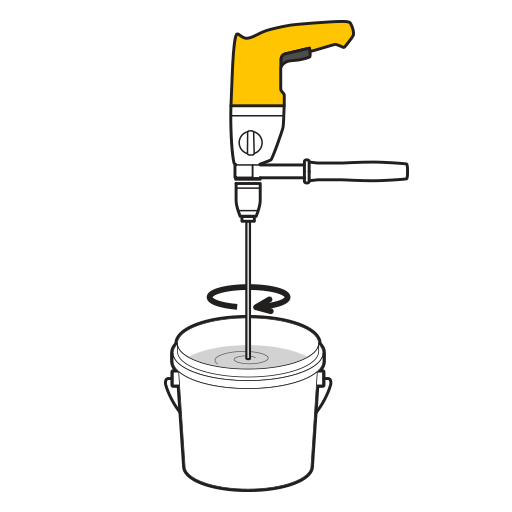
Blend it up
Stir the compound thoroughly until it becomes a homogeneous substance.
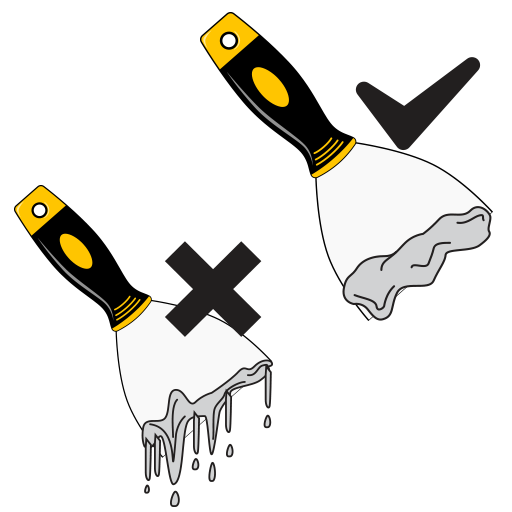
Get the right consistency
The adhesive consistency should be soft but not slip off the joint knife.
Apply adhesive
to the wall

Caution.
Get everything ready for the installation ahead of time before you apply the adhesive to the wall. Once the glue is applied, make sure to stick the AMK sheet on right away. If you wait too long, especially when it’s sunny or windy, the adhesive might get weathered and lose its strength.
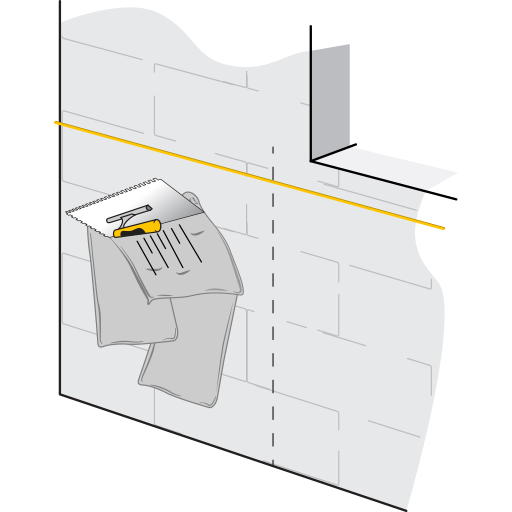
Start with flat trowel
First, spread a thin layer of adhesive on the wall with a flat trowel that will cover 1 sheet of AMK at a time.
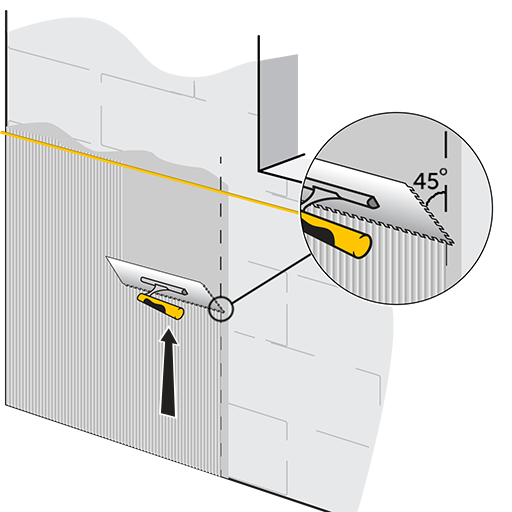
Use a Notched Trowel
Use a notched trowel (6 mm teeth) to spread the glue evenly in one direction. This creates grooves that enhance adhesion.
Install AMK Sheet

Caution.
Ensure that the wall is evenly coated with glue that forms a bond with the marble chips used in AMK, securing them to the wall.
Improper glue application can weaken the bond between the AMK and the wall, which may cause the marble crumbs to come off when removing the protective film.
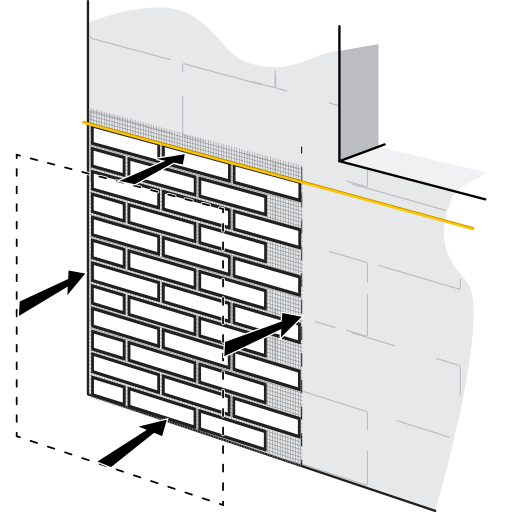
Apply AMK
Apply the AMK and press it against the wall to fix it in place with glue.
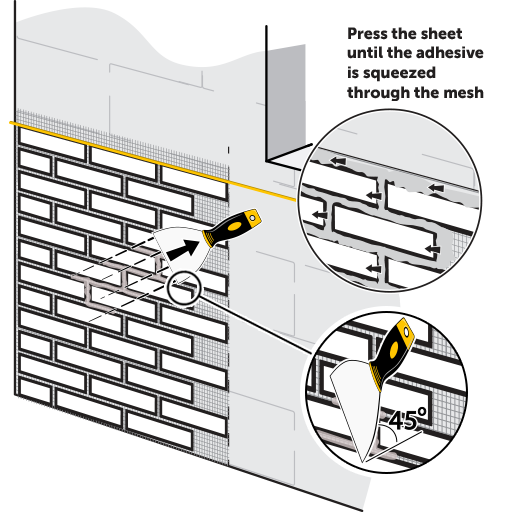
Smooth out
Start smoothing out and embedding AMK sheet from the centre using taping knife.
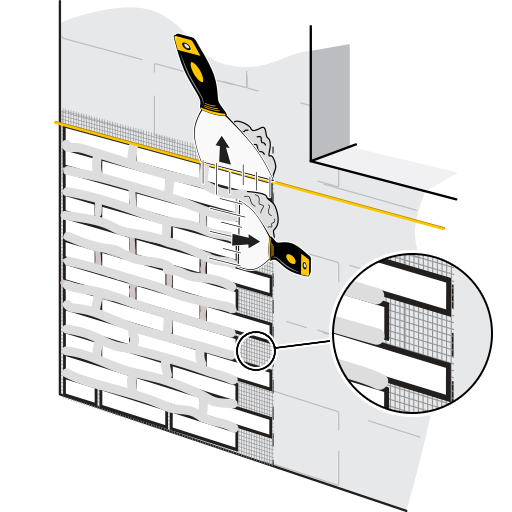
Clean the edges
Remove excess glue from the edges so the mesh is clearly visible to provide seamless overlapping with the next sheet.
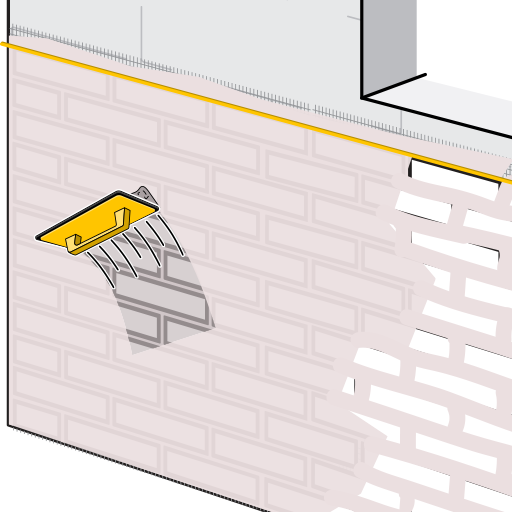
Fill the seams
Use the same glue to fill the seams of AMK. Hold flat trowel or foam grout float at 45-degree to create accurate grout lines. You may try making glue thinner for that purpose.
Remove
the protective film

Wait until the adhesive completely dries out and only then remove the protective film.
Depending on the type of substrate and environmental conditions, the adhesive may require 3-4 days to fully cure and achieve optimal bond strength. Proper curing is essential to ensure durability and a long-lasting finish.
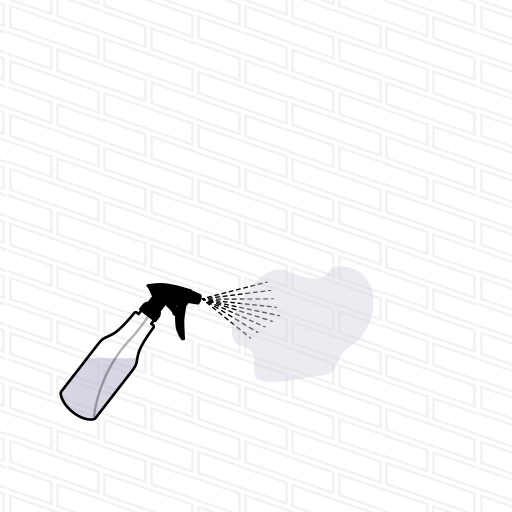
Spray water
Moistening the adhesive after it has dried can make it easier to locate and lift the edge of the protective film for removal. This simple step helps streamline the process and ensures a clean, flawless finish.
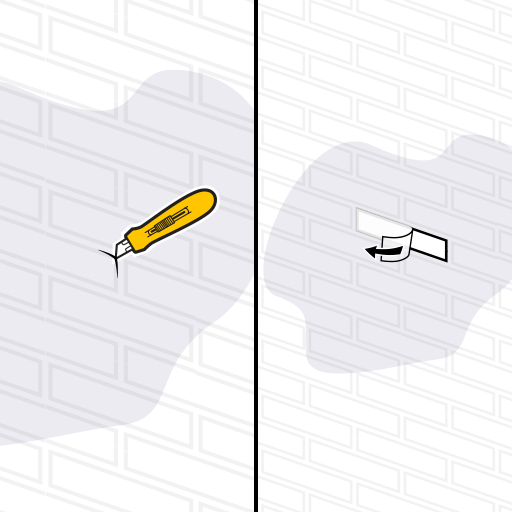
Remove the protective film
Use any sharp tool to lift the film's edge and peel it away, unveiling the stunning AMK finish.

Caution.
If you notice marble particles coming off with the protective film, stop immediately, as the glue may not be fully set yet.
Additionally, avoid removing the protective film during hot weather under direct sunlight to ensure the best results.
Pro tips for perfect results
Get ideal corner
with AMK

Pro tips from Alex and Bricks
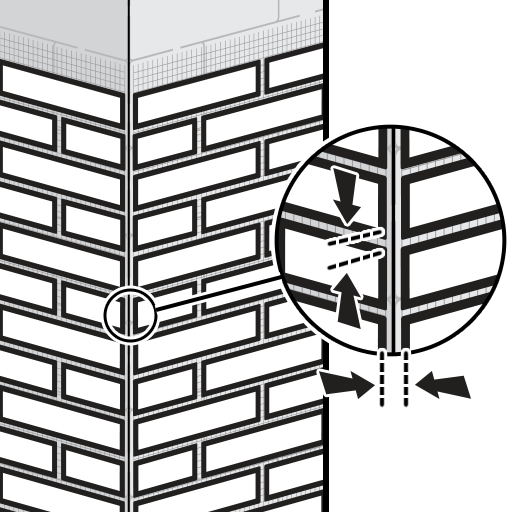
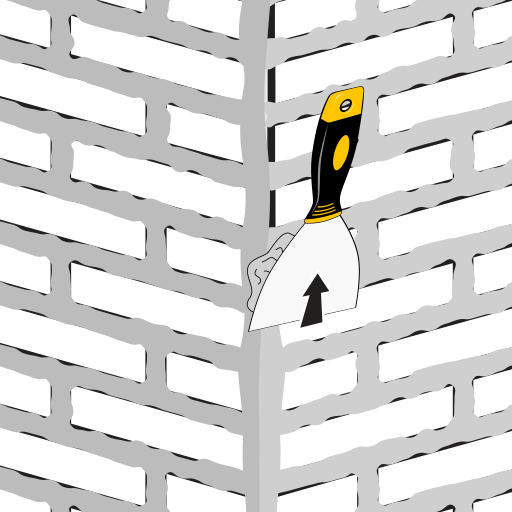
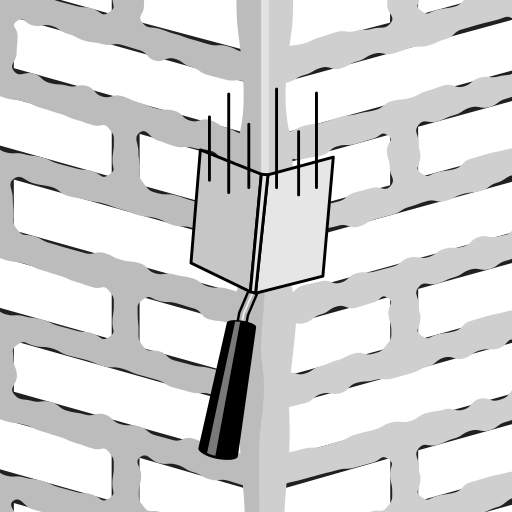
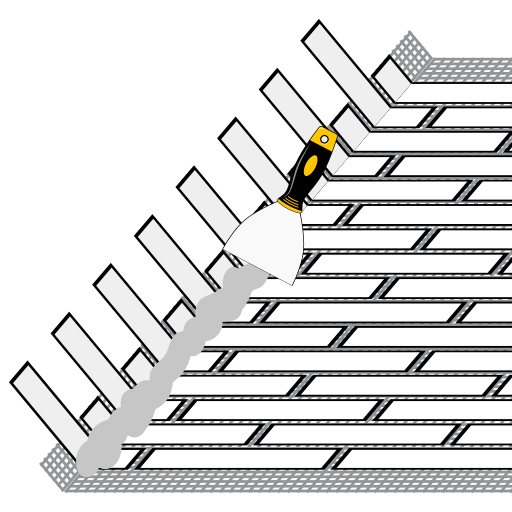
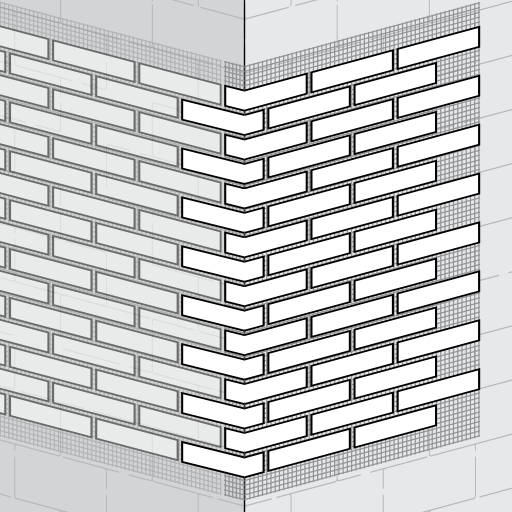
There are two methods to finish a corner with AMK. Pick up the one that is more convenient for you.
1. Method
2. Method
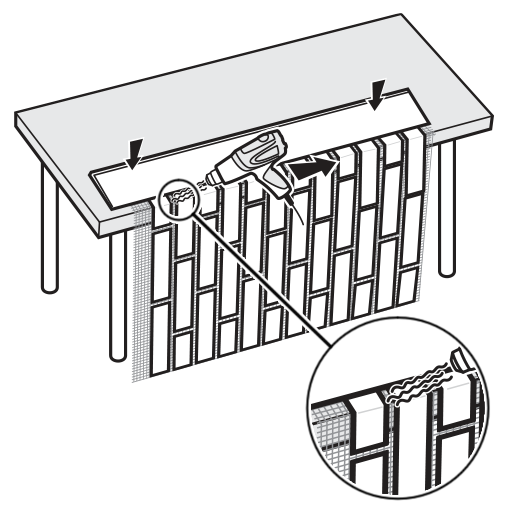
Make the measurements and mark the bending line on AMK sheet. Lay the sheet on a table so the bending line is placed on the edge. Press the sheet with a straight tool like a plaster ruler just beyond the bending line to get the best result. Start heating bending line area with a heat gun as shown in the pic.
AMK Row
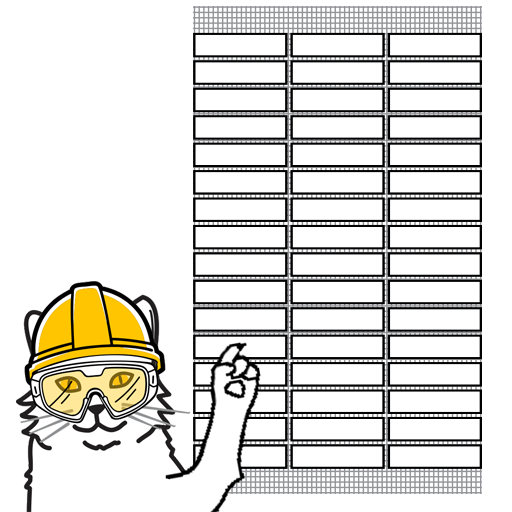
Use AMK Row to create perfect corner finish.
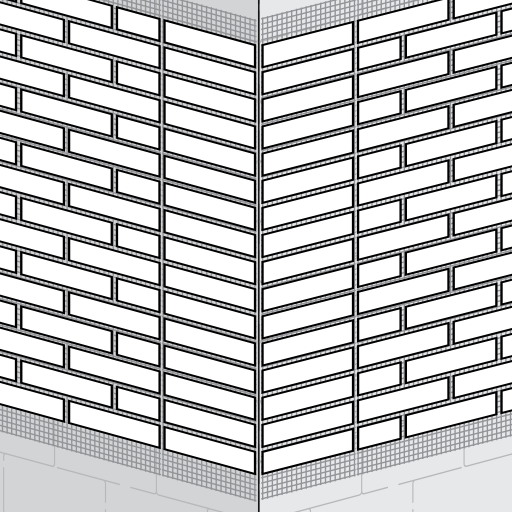
In the corner joint method.
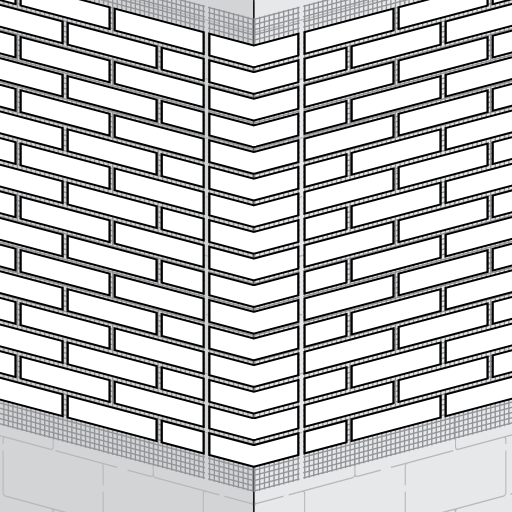
In the bending method.
Installation on
various materials
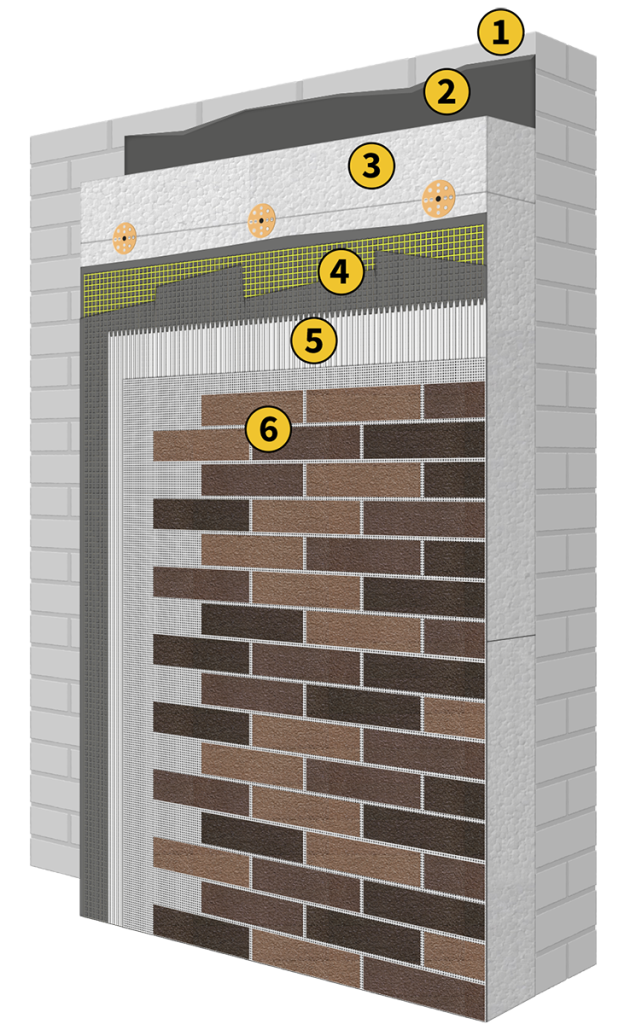
Installation of AMK on XPS and EPS boards.
Proper surface preparation is crucial before installing AMK on XPS and EPS boards, especially if they are not designed for plaster coatings.
- XPS Boards: Roughen the surface using 60 or 80-grit sandpaper to improve adhesion.
- EPS Boards: Use a metal spiked roller or metal brush for texturing, then remove debris for a clean base.
- Final Preparation: Apply a deep-penetrating primer for better adhesion and durability.
- Reinforcing Basecoat: Recommended for added stability, crack prevention, and a long-lasting finish.
- Wall
- Adhesive mortar
- EPS/XPS insulation board
- Basecoat and Reinforcement Mesh
- White tile glue
- AMK
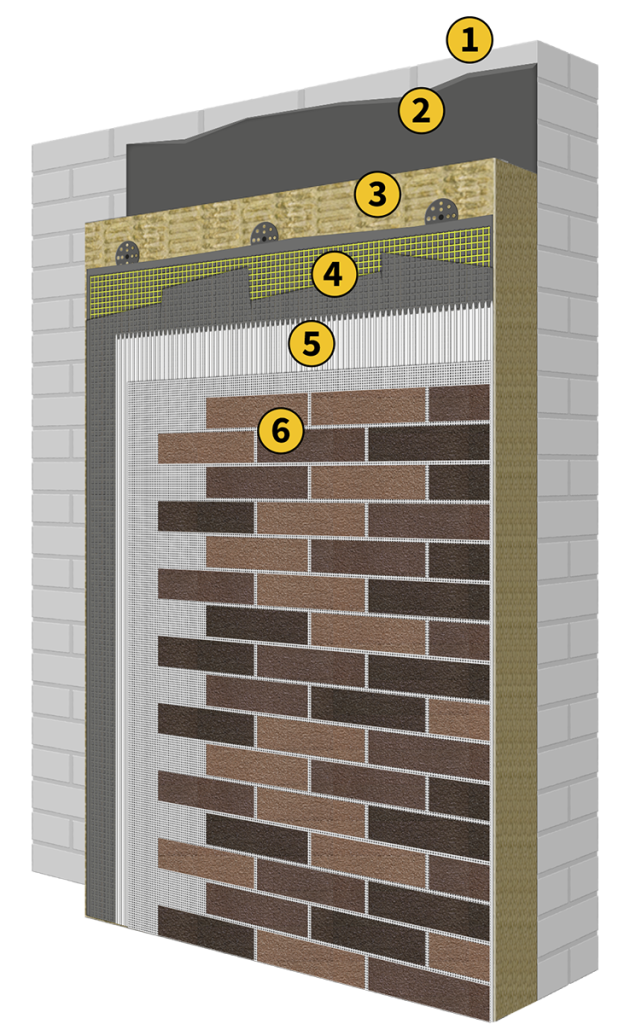
Installation of AMK on mineral wool.
Important! The density of the mineral wool batt must be at least 100 kg/m³ to ensure stability.
Before applying AMK, a reinforcing basecoat must be installed. This layer provides a rigid surface, preventing damage to wool fibers the notched trowel and ensuring better adhesion.
This preparation guarantees a durable, smooth, and long-lasting finish.
- Wall
- Adhesive mortar
- Mineral wool insulation batt
- Basecoat and Reinforcement Mesh
- White tile glue
- AMK
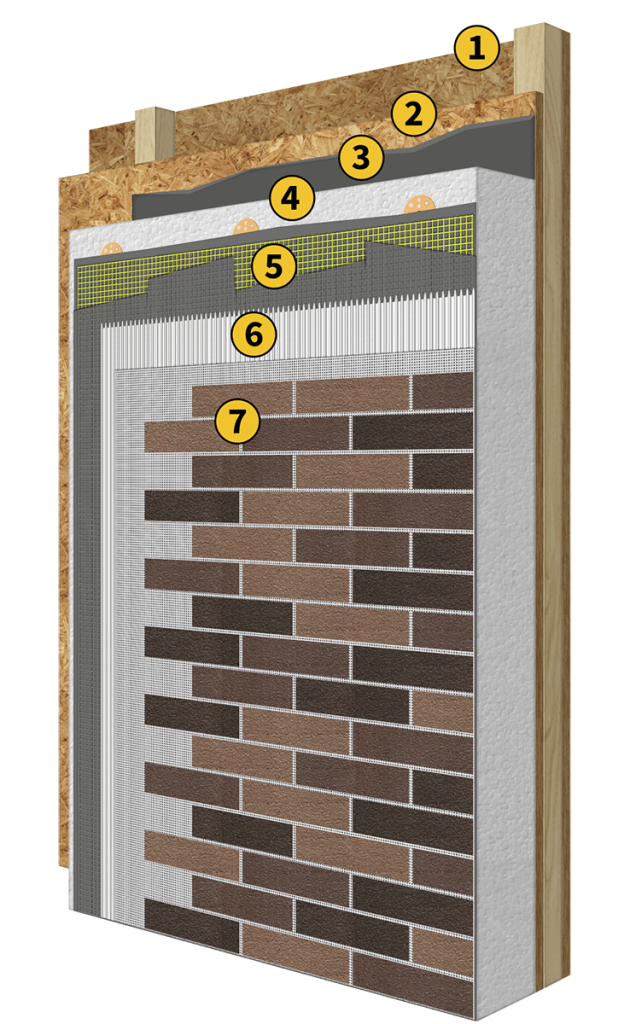
Installation of AMK on OSB or Plywood.
Important! OSB and plywood tend to expand when exposed to moisture. To prevent deformation and ensure long-term durability:
Cover the Surface with EPS
Apply an EPS (expanded polystyrene) layer over the OSB or plywood to create a stable base.Apply a Reinforcing Basecoat
The basecoat strengthens the surface, preventing movement and ensuring proper adhesion of the AMK.
This method guarantees a smooth, moisture-resistant, and durable finish.
- Frame
- OSB/Plywood
- Insulation Adhesive
- EPS/XPS
- Basecoat and Reinforcement Mesh
- White tile glue
- AMK
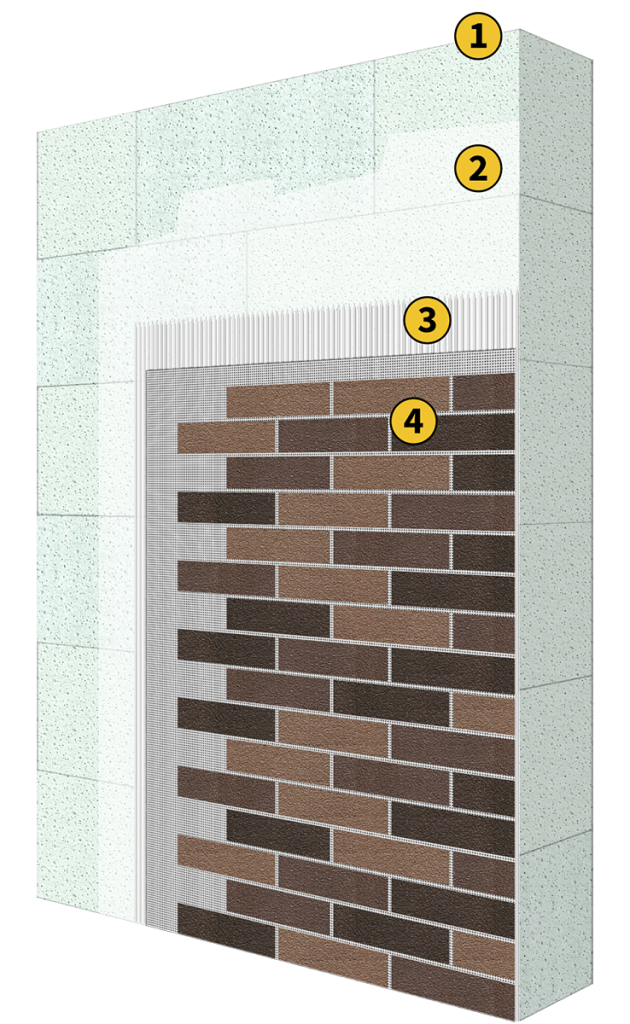
Installation of AMK on Gas Silicate Blocks, AAC Blocks, Concrete Plaster, Drywall, and Cement Board.
Installing AMK on these surfaces requires minimal preparation:
- No Additional Preparations Needed – These materials provide a suitable base for AMK installation.
- Clean the Surface – Remove dust, dirt, and debris for optimal adhesion.
- Apply a Deep Penetrating Primer – This enhances adhesion and ensures durability.
- Ensure a Smooth Surface – Since AMK is only 2 mm thick, any bumps or unevenness will be visible. Proper leveling before installation is key to achieving a flawless finish.
- AAC Block / Concrete Plaster / Drywall / Cement Board
- Primer
- White tile glue
- AMK
amkdecorativecovering@gmail.com

amkdecorativecovering@gmail.com


